What is Jenkins? And, How Jenkins is useful in Automation Test?
Jenkins job for automation test! At the present time, Jenkins is an open-source automation server to automate all types of Build activity. It is one of the popular tools for Continous Integration so it is used to schedule nightly jobs, trigger automation build on a time basis, or by polling git branches. In this tutorial, we will create a Jenkins job to trigger periodic automation builds.
With this intention we brought This Jenkits job for automation test tutorial which will guide you by providing step by step explanation and snapshot. Refer below for step-by-step instructions.
Prerequisite:
- To explain, Jenkins should be installed on the machine and have the credential of the user who has the right to create Jenkins job for automation test.
- Under those circumstances, make sure the Automation Project is complete and is running
- Windows batch command to trigger from Command Line
For instance: In this article, we used Selenium Automation Project which is maven based and we trigger using the below command
cd <project root location>mvn clean verifyThe above command can be different for your project as it depends on the project configuration.
Steps to Create Job for Selenium Automation Project:
Step 1: Start Jenkins Server: Go Jenkins installation folder and run jenkins.exe on windows or run below command
cd C:\Program Files (x86)\Jenkins
java –jar jenkins.war   (by default Jenkins will run port 8080)
or run on specfic port
java –jar jenkins.war  --httpPort =9090   (Jenkins will run port 9090)
Step 2: Open Browser, navigate to Jenkins URL, and login with credentials( as per Jenkins Tutorial 1)
http://localhost:9090/login?from=%2F

Step 3: Now click on New Item to create New Item (in case of first it will open by default). Enter Project Name and click on Freestyle Project and click on OK.

Choose according to Project but in this example project is saved on the same machine so not required.

Choose Correct Source Code Management- In this example code is available locally so we choose None.

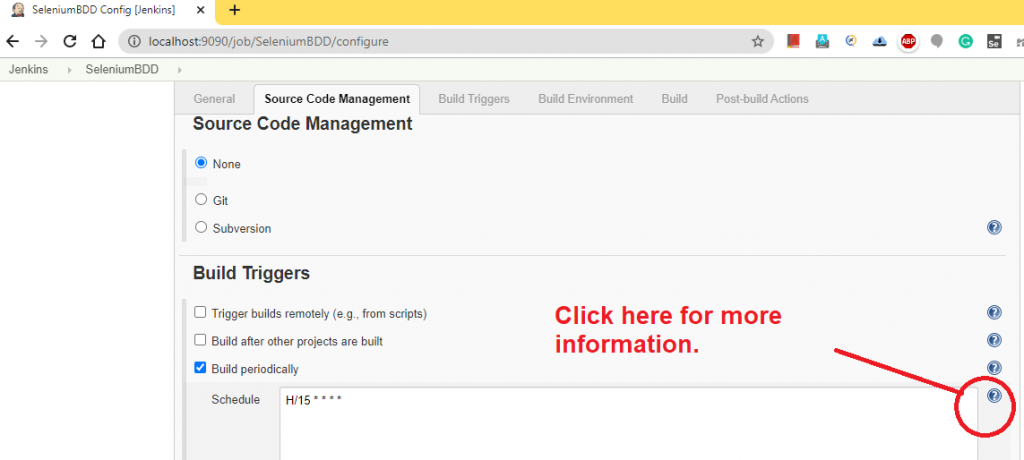
Step 4: Build Triggers: This setting is used to decide at what time our Automation Build will trigger. In the present example, we schedule our job periodically. Period of jobs passed in cron-expressions. Refer below more insights:
Use below if you want to trigger it every 15 min.
H/15 * * * *
Examples:
# every fifteen minutes (perhaps at :07, :22, :37, :52)
H/15 * * * *
# every ten minutes in the first half of every hour (three times, perhaps at :04, :14, :24)
H(0-29)/10 * * * *
# once every two hours at 45 minutes past the hour starting at 9:45 AM and finishing at 3:45 PM every weekday.
45 9-16/2 * * 1-5
# once in every two hours slot between 9 AM and 5 PM every weekday (perhaps at 10:38 AM, 12:38 PM, 2:38 PM, 4:38 PM)
H H(9-16)/2 * * 1-5
# once a day on the 1st and 15th of every month except December
H H 1,15 1-11 *

Step 5: Build Environment:
Choose the correct Build environment as per your requirement.

Step 6: Add Build Step: In this section, we pass command-line command which can invoke build. This command is equivalent to a command-line expression.

Step 7: Add window batch command to trigger :

Step 8: Add Post Build Action: To put it another way, this section gives you the flexibility to add steps after post-build execution. In this example, we added email after post Job execution. In effect, you will get an email after job completion.

Enter email id in the Recipients field and click on Save.

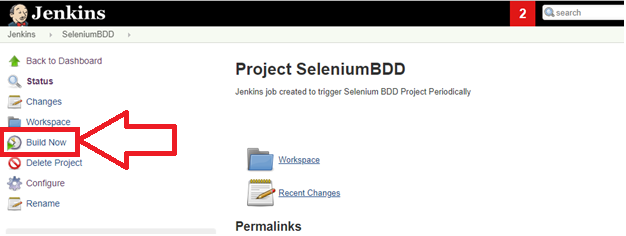
Go to Navigation Plane and click on Build Now > Go to Build History Area and click on correct build > Go to Console Output and verify Console Log


Go to Project Dashboard: On the Project dashboard and blinking blob shows that currently build is running and cloud shows build success rate. In this situation, it will be rainy if previous builds fail.

Well Done! By following the above steps you created the first freestyle job to trigger your automation build periodically. Hope you completed still if you face any issues then feel free to message us on the @ThoughtCoders Facebook page. We will help you.
To this end, if you want to learn more about Jenkins then refer to our next tutorial on Jenkins.
[mailpoet_form id=”2″]


