Why we need Maven in our project?
Tutorial for Maven installation! During coding journey, we come across one of the most common challenge to manage project information, maintain best practices in coding, machine-independent code and migration of project. All things considered, let’s take one example where you work in a team and each developer working on different module and adding dependent jar as per their need also everyone adding a different version of dependency here maintain project artefacts is quite challenging and while merging cod, sharing or deploying on the server is terrible due to different version of jars. To clarify, one of the great tool developed by Json in 2002 which solves these problems that tool is “Maven”.
What is Maven & What’s the purpose of Maven?
Maven, a [Yiddish word] meaning of it “accumulator of knowledge”. Maven is used to manage java based Projects. To put it another way, here is the objective of Maven:
- Making Build Process simpler
- Provide uniform Build System
- Quality Project Information
- Easy Deployment
- Manage repository
Pre-Requisites:
- Step 1: To begin with, Java should be installed in machine.
How to check java version from cmd?
Before moving forward, let us follow steps to check Java Installation/Version: Open command prompt and type “java -version” and enter.

If java is not installed on your machine then without doubt click here for step by step tutorial of Java installation
Or, Click on below Link: https://thoughtcoders.com/blog/install-java-and-setup-environment-variable/
Maven Installation : Tutorial for Maven Installation
Steps to Install Maven:
- Step 1: Go to below link
http://maven.apache.org/download.cgi
- Step 2: Scroll to File section and download binaries file as per machine. Click on highlighted link to set up on windows machine.
Or directly click on following link: https://mirrors.estointernet.in/apache/maven/maven-3/3.6.3/binaries/apache-maven-3.6.3-bin.zip

- Step 3: Unzip downloaded folder
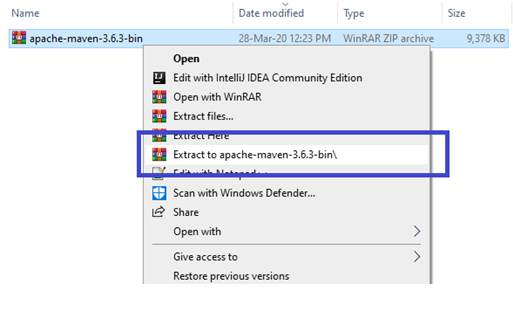
- Step 4: Save Unzipped folder at specific location

Setup Maven Environment Variables
- At first, go to computer start and search “Environment Variables”
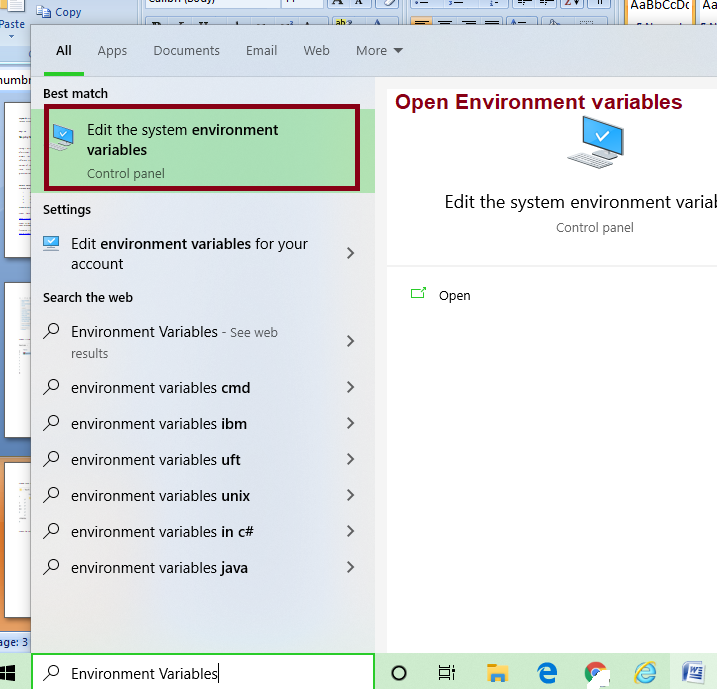
- Open Environment variables and new window will open with “Environment Variable”.

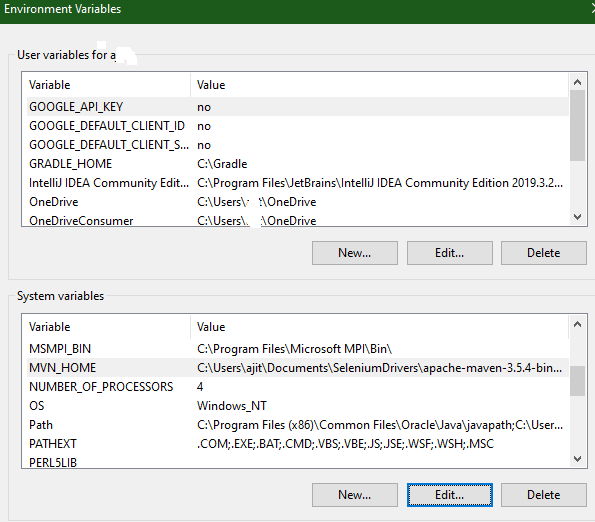
- Once you are there, click on “New” to create System Variable:

- Create System variable with name “MAVEN_HOME” and enter maven binaries folder path till bin folder in variable value field. Refer below snapshot:
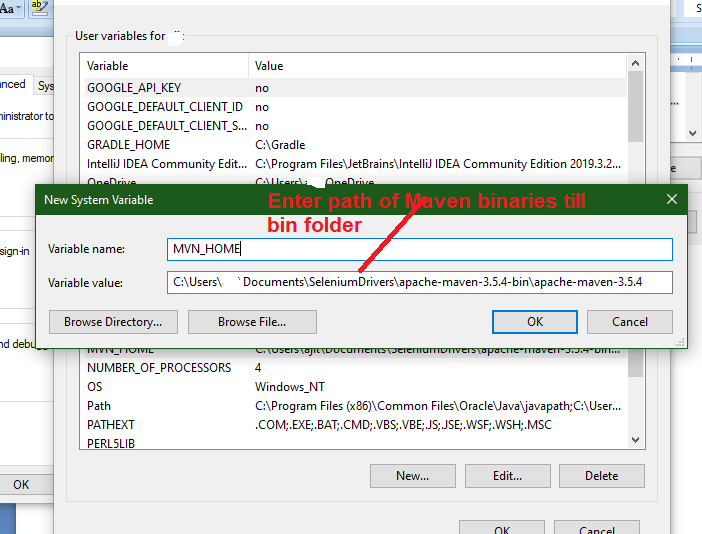
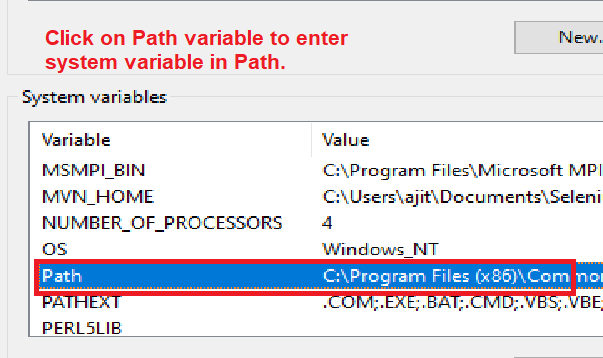
- Click on “OK” and click on “Path” variable . New window “Edit environment Variable” open.

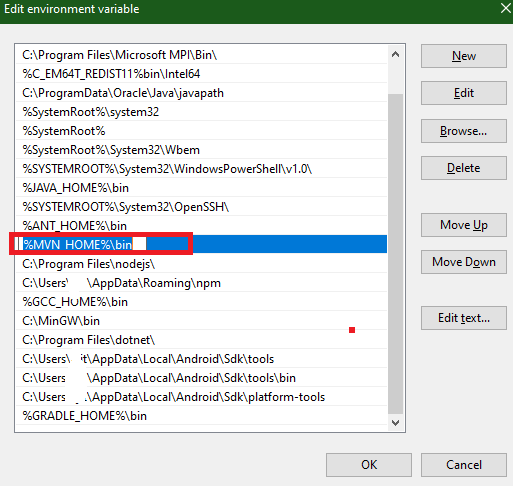
- Add “%MVN_HOME%\bin” in “Path”variable as per below snapshot:
- Step 5: As soon as you are done with it, click on Ok and Apply and save all windows.
- Step 6: Lastly, to verify Maven installation- Open command prompt and type “mvn-version” and enter. It will give Maven version.

To conclude, hope above steps help you in Maven set up. Please feel free to contact us on query@thoughtcoders.com if you face any issue or need more information.
Reference :
http://maven.apache.org/download.cgi

