
Selenium Testng Setup Tutorial
What is TestNG Framework & How to Setup or Install TestNG Selenium Framework?
TestNG is a testing framework inspired by JUnit & NUnit with many additional features hence making it even more powerful & can help in designing a more robust automation testing framework.
Generally, TestNG covers all categories of tests: unit, functional, end-to-end, integration, etc…
And, In this TestNG tutorial of ThoughtCoders you will learn “How to install and setup TestNG Selenium Framework” using Java? For this purpose, on the whole, we are providing you with step by step process and with a sample TestNG Selenium Framework.
Pre-Requisites:
- Firstly, install Java
- Any IDE like – Eclipse, IntelliJ IDEA, etc.
- Setup Selenium on System
- Download Browser driver (like- chrome driver, gecko driver, etc. )
Tutorial on Selenium Installation & Setup: Click Here
Steps to Install and Setup TestNG Selenium Framework:
Install TestNG jar files from “mvnrepository”
- Go to mvnrepository website & Search “testng”

- Click on testng 6.14.3 version and download jar file


Now, Create Java project & add Selenium, TestNG dependency or jar file
- Open an IDE (Recommended – IntelliJ) & Create a Java Project

- After, setting up Java project, Project structure look like this

- Right click on project folder and click on “Open Module Settings” option

- Go to Module -> “Dependencies” tab -> Click on “+” icon -> Click on Jars or directories

Note: Enlarge or Zoom above image to see steps to add Jar file
- Browse & Select testng jar file and Click on “Ok” button

- Now add the JAR files that contain the Selenium API. These files are found in the Java client driver that we downloaded from http://docs.seleniumhq.org/download/


Add Selenium with TestNG Project Structure after Selenium and TestNG Jar dependencies:

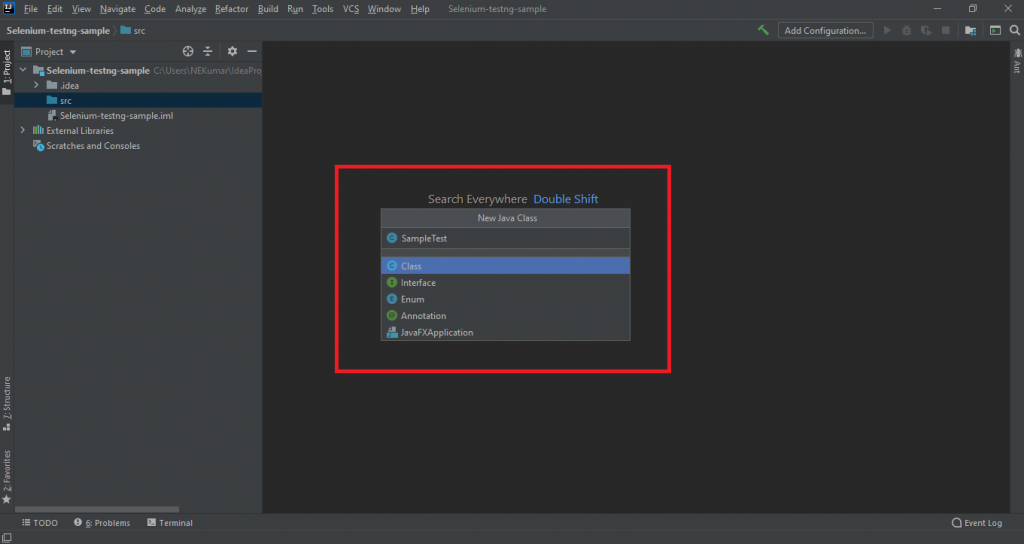
- Right click on “src” folder -> Click on New -> “Java class” -> Create Java class file (SampleTest)

Coding our First Test Case
Let’s create our first Test Case that will check if ThoughtCoder’s Blog page is correct. Refer to the code below.
import org.openqa.selenium.*;
import org.openqa.selenium.chrome.ChromeDriver;
import org.testng.Assert;
import org.testng.annotations.*;

public class SampleTest {
    public String baseUrl = "https://thoughtcoders.com/blog";
    public WebDriver driver;

    //Using @Test testng annotation
    @Test
    public void verifyBlog(){
        System.out.println("Launching Browser");
        System.setProperty("webdriver.chrome.driver","C:\\Users\\NEKumar\\Downloads\\drivers\\chromedriver.exe");

        driver = new ChromeDriver();
        driver.navigate().to(baseUrl);
    }
}
On the positive side, hope, this tutorial eith the result that helped in installation, setup of Selenium with TestNG automation framework, and above SampleTest code clearly to illustrate that how we use TestNG annotation with Selenium to enable extraordinary features & reporting.
Summing up, we will continue exploring other Selenium with TestNG topics. To that end, subscribe to our newsletter to stay updated with our next blog.